Romeo is a Dead Man Bastards guide: The best Bastards, and how to use fusion to get all 21 Bastards
Find out which combinations of Bastards you need to get every type in Romeo is a Dead Man

One of the most useful features in Romeo is a Dead Man is its Bastard system.
Not only does equipping Bastards make combat a little easier, it’s also possible to breed them and upgrade them into even more powerful ones, or even entirely new species.
It can be a little confusing knowing which Bastards breed new ones, and given that there are 21 of them it can also be tricky deciding which Bastards in the game are the best to use.
This complete guide to the Bastards in Romeo is a Dead Man will help you figure everything out.
Romeo is a Dead Man: What are Bastards?
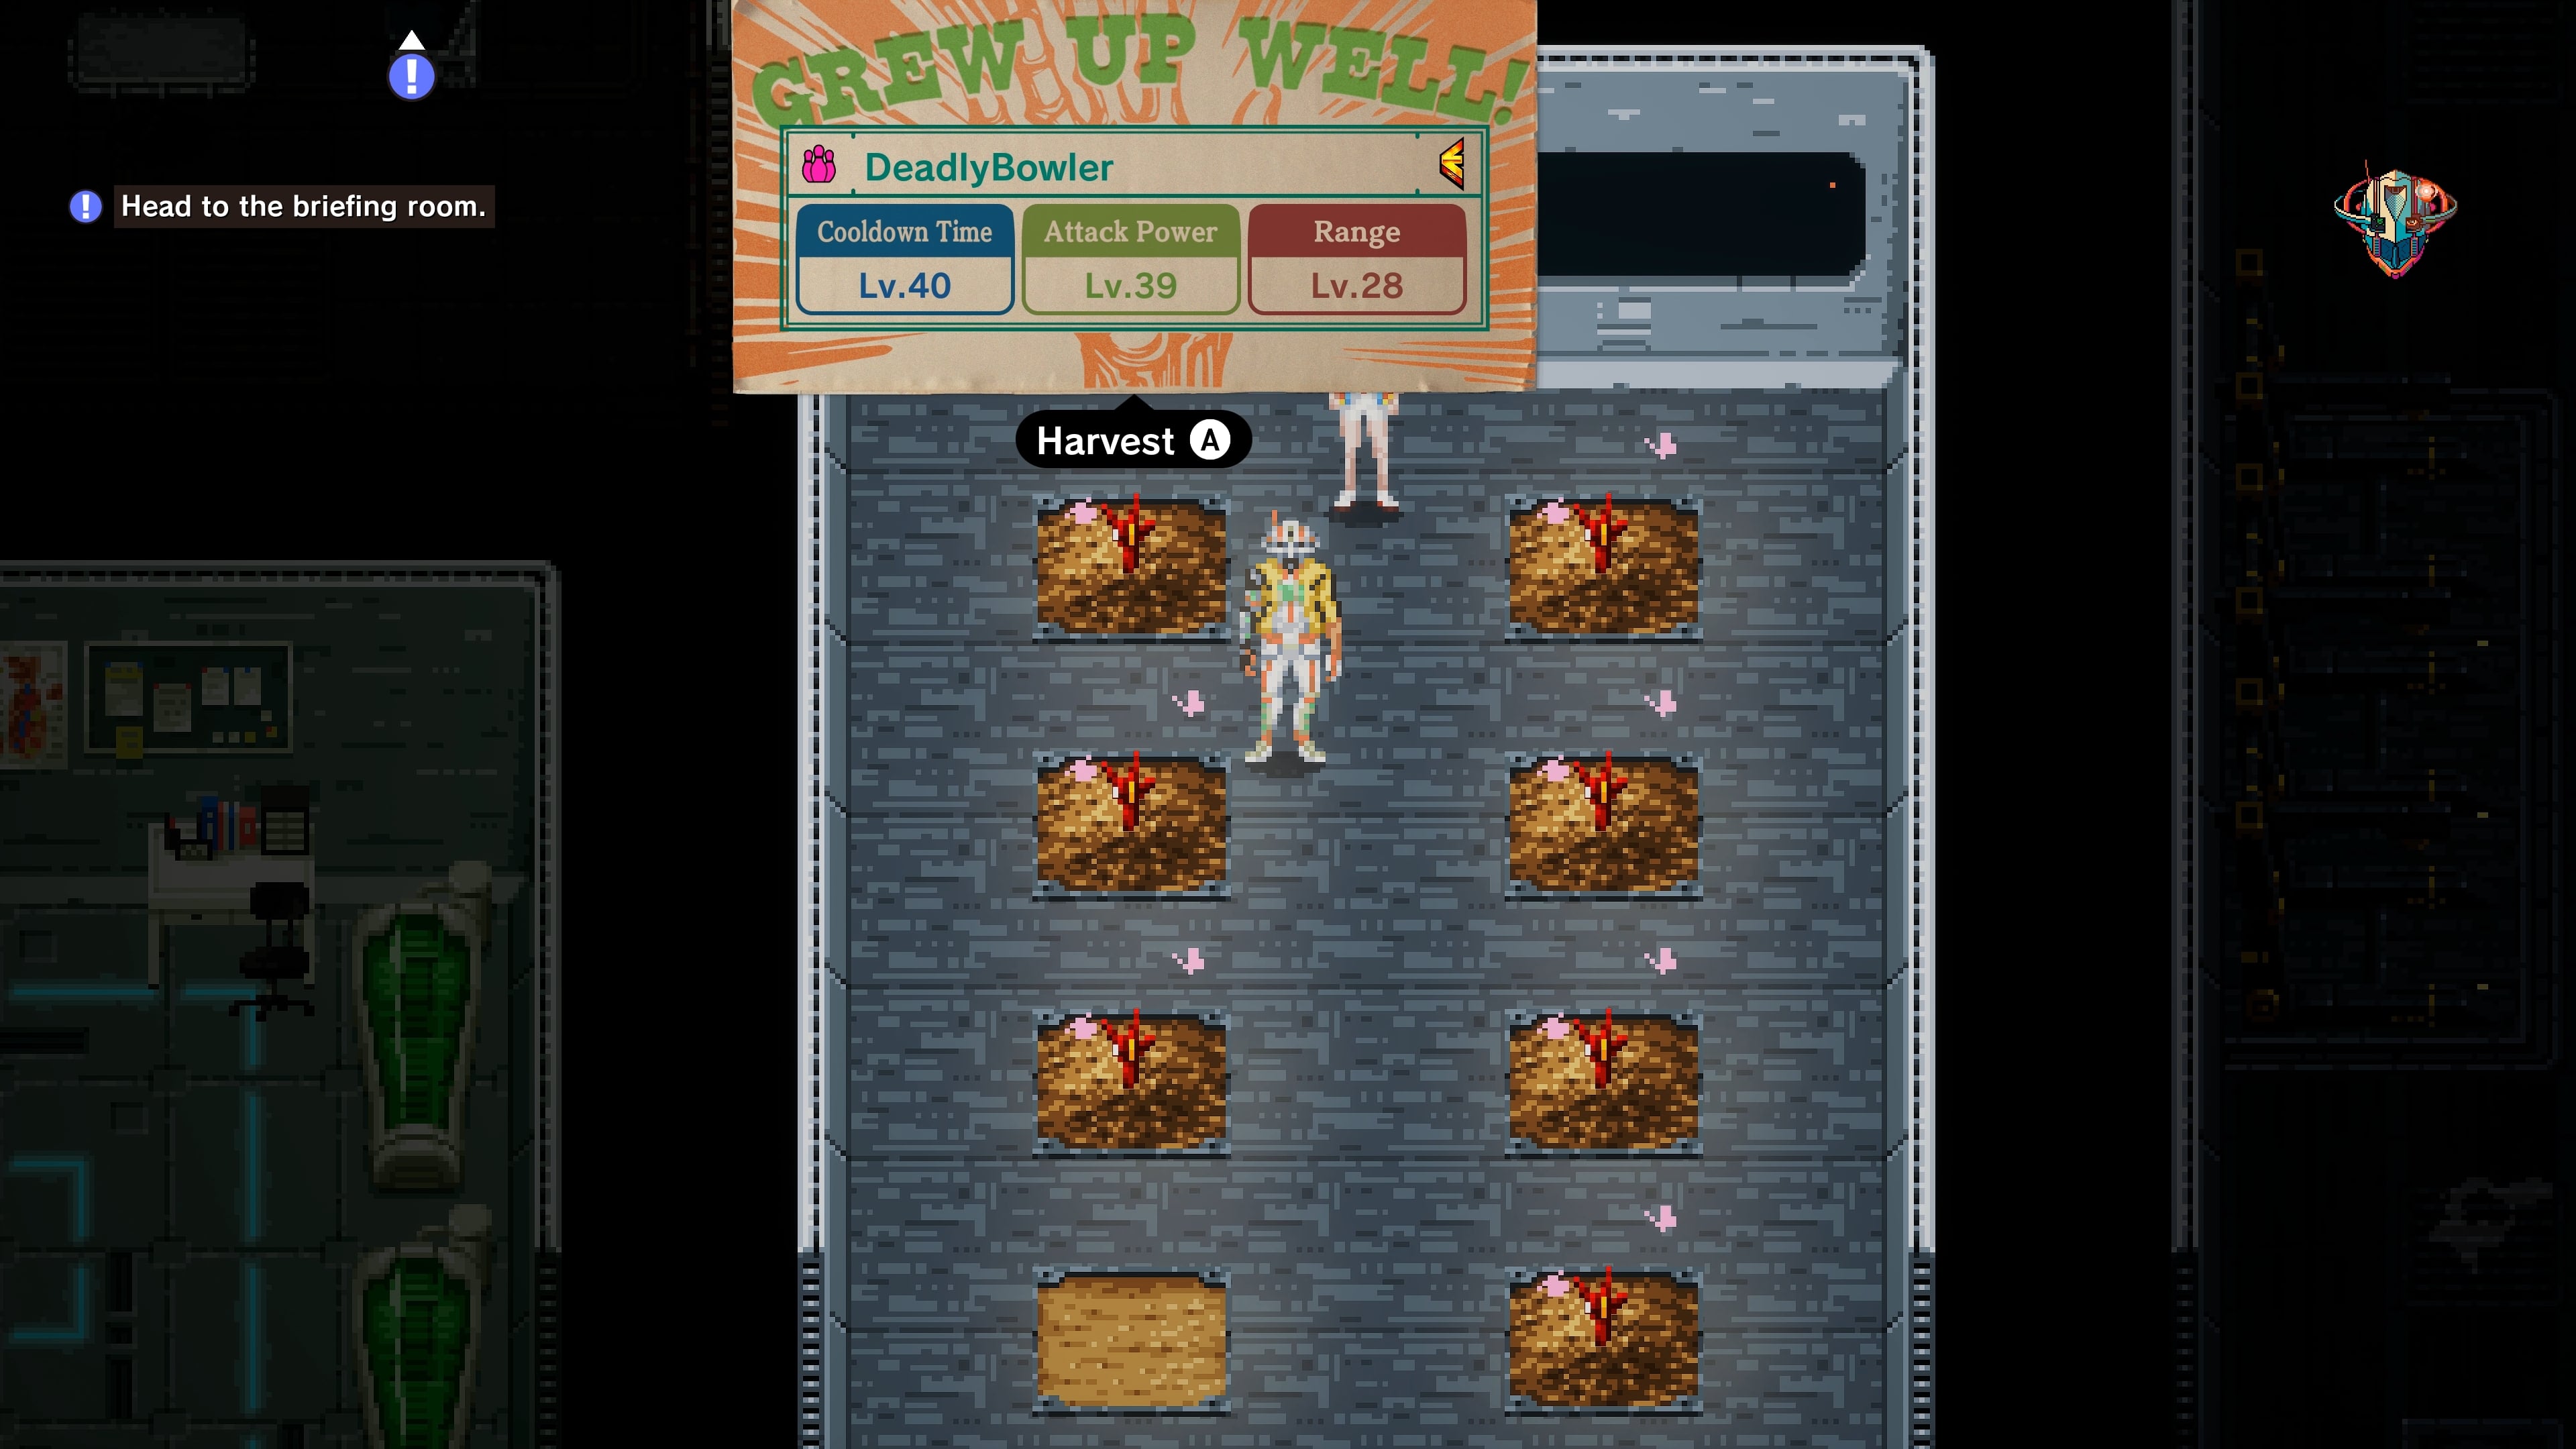
As you defeat enemies in Romeo is a Dead Man, they’ll occasionally drop large seeds.
These seeds can be planted in the garden area of the Last Night spaceship hub (the 16-bit section), which can be found by walking down the main corridor in the ship and taking the long right-hand corridor.
When you plant a seed, it’ll take 10 minutes to fully ripen. You can either sit there and wait, or just move onto the next stage of the game, and come back to get them later on.
After a see ripens, the blue hand sticking out of the dirt will turn into a red one. That’s when you can then harvest your Bastard – a zombie helper.
You can assign Bastards to your inventory in the pause screen. At first you can only assign one but as you play through the game the number of Bastard slots will eventually increase to four.
Bastards can be summoned at any time by holding RB / R1 and pressing their corresponding button. After they disappear there’s a cooldown period before they can be summoned again.
Romeo is a Dead Man: How does Bastard Fusion work?
The initial batch of Bastards you come across in the game are fairly week, but that’s where Bastard Fusion comes into play.
If you speak to Luna in the garden area she’ll give you a number of Bastard cultivation options, one of which is Bastard Fusion.
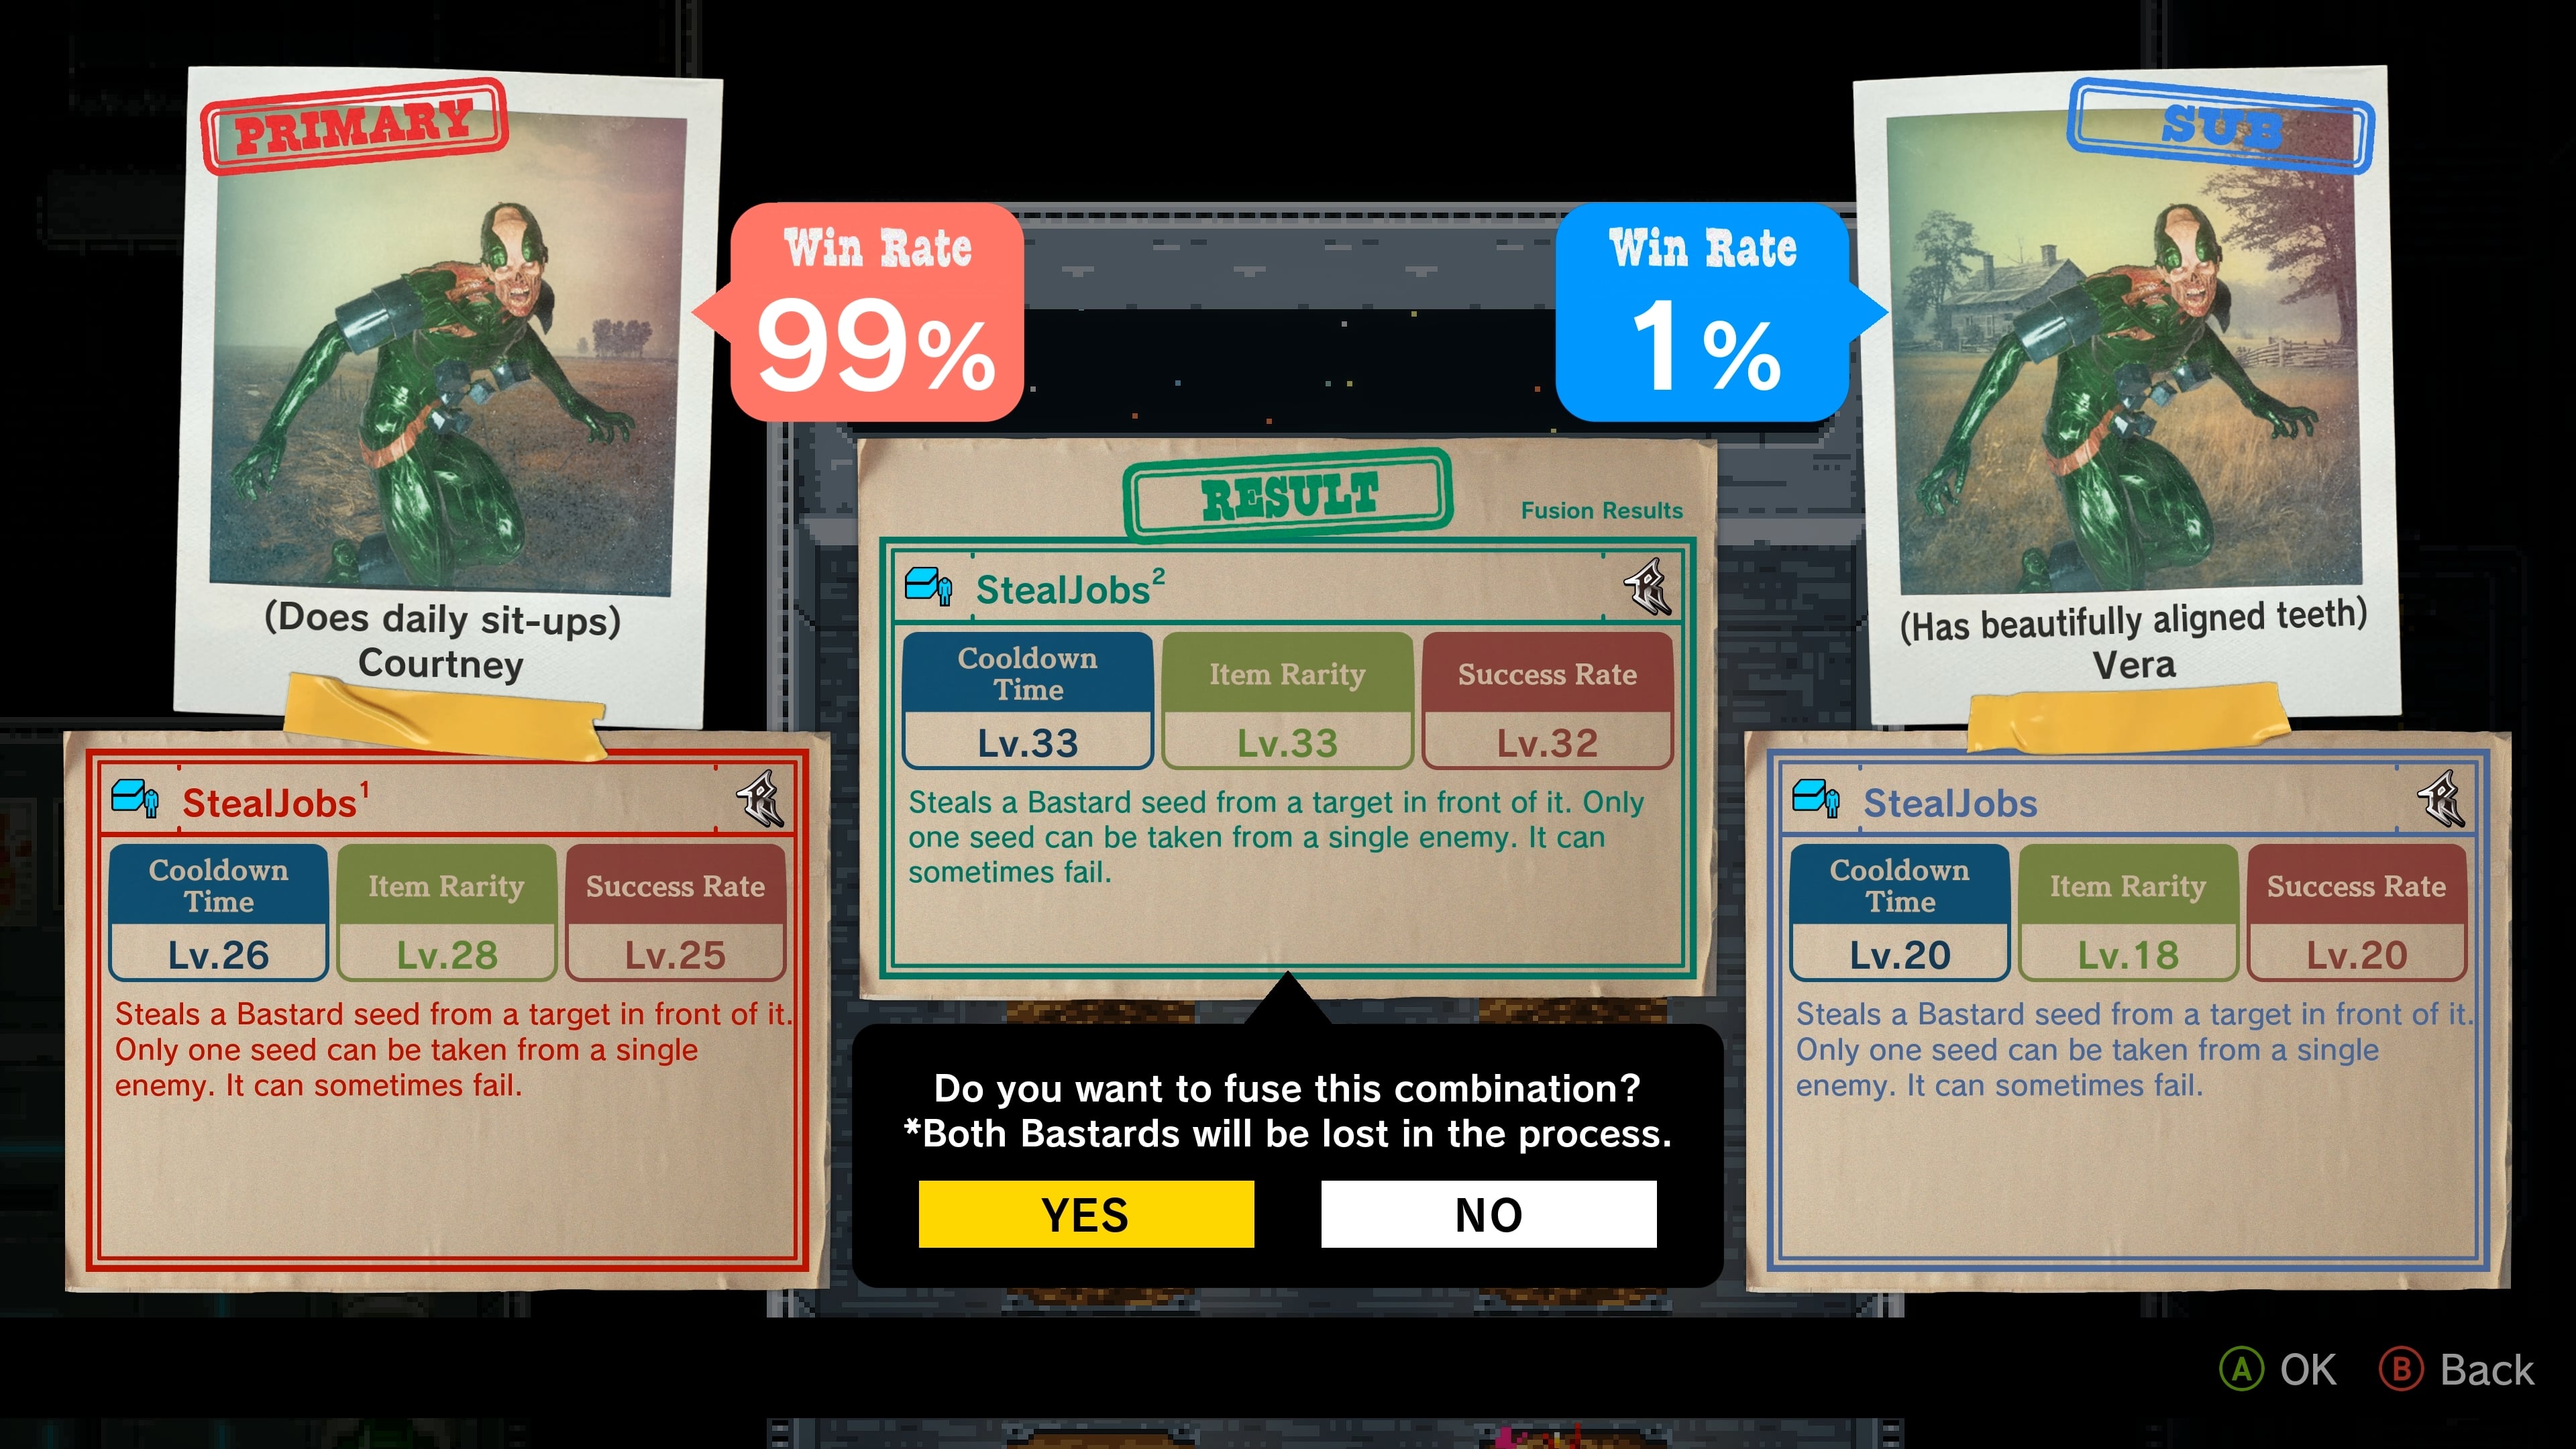
This lets you choose two of your existing Bastards (they have to have already been grown and harvested), and combine them. You’ll lose both Bastards in the process, but the resulting Bastard will be stronger.
When you fuse two Bastards, you’ll get a new seed, but when you plant this one it ripens instantly meaning you don’t have to wait 10 minutes to harvest it.
The most sure-fire way of getting the Bastard you want is to fuse two Bastards of the same type. This will result in a new Bastard with greater stats than its ‘parents’. For example, combine two SentryCannon Bastards and you’ll get a new SentryCannon Bastard with better stats for attack power, range and cooldown time.
Some Bastard types can only be created by fusion two specific Bastards together. The game eventually gives you clues as to which Bastards these are, but if you’re not interested in such teasing we’ve got the full list below.
Romeo is a Dead Man: The complete list of Bastards, what they do and how to get them
Here’s the definitive list of all 21 Bastards in the game.
Each listing will tell you the Bastard’s name, what they do, and – if they can only be earned through Bastard Fusion – which species you have to fuse to get them.
SuicideAttack
- Common
- Fuse – CreepingVenom + any Common Support-type Bastard
- SuicideAttack charges towards enemies, then blows itself up, damaging enemies and blasting them backwards.
SentryCannon
- Common
- Fuse – N/A
- SentryCannon poses like a fish (for some reason) and fires a continuous stream of bullets at enemies for a period of time.
ThunderChain
- Rare
- Fuse – PulseMirror + Screamadelica
- As the name suggests, ThunderChain fires a powerful shock of electricity at any enemy standing in front of it, which is then passed on to any surrounding enemies.
GreenTornado
- Rare
- Fuse – N/A
- GreenTornado makes a large tornado appear, catching nearby enemies and continuously damaging them.
MultiLazer
- Epic
- Fuse – Nosferatu + FrostBolt
- MultiLazer will stand where it’s summoned and shoot out powerful laser beams. The only catch is that the lasers shoot in random directions so it’s a bit of a gamble.
DeadlyBowler
- Epic
- Fuse – WeakenFlower + Purifying Zone
- If you have a bunch of enemies in front of you, DeadlyBowler might be your best choice. It rolls a bowling ball towards enemies, knocking them down and causing damage. If it manages to hit at least five enemies, the ball then explodes.
Graha Malla
- Legendary
- Fuse – MultiLazer + DeadlyBowler
- This one’s another gamble but worth it if it pays off. When it spawns it charges up an extremely powerful attack which deals a lot of damage and knocks back enemies. If it takes too much damage while it’s charging it dies before getting to unleash its attack.
HealingSpire
- Common
- Fuse – SuicideAttack + any Common Technical-type Bastard
- One of the few Bastards used for defence instead of attack, Healing Spire will create a healing zone where it spawns, which will restore your health if you stand there. Obviously this works better if you spawn it in a safe space away from enemies.
Screamadelica
- Common
- Fuse – N/A
- Screamadelica lets out a powerful scream, which knocks back any enemies who are close and stuns any who are far away.
ManaBloom
- Rare
- Fuse – ThunderChain + PulseMirror
- Striking a rather fetching ballet pose, ManaBloom attracts enemies to where it spawns, distracting them and leaving them open to attack. This only lasts for a set time, or until it’s killed.
SlowBallad
- Rare
- Fuse – N/A
- If the action’s getting a bit intense for you, SlowBallad slows down the actions of any enemies within its range. When combined with other Bastard summons, this can be very useful.
FrostBolt
- Epic
- Fuse – GreenTornado + StealJobs
- FrostBolt will fire a bunch of ice shots, and any enemies hit by them will be frozen in place for a period of time.
Purifying Zone
- Epic
- Fuse – DeadlyBowler + SweeperBeam
- If you find yourself in a fight where there are poison attacks, PurifyingZone makes an area where you can be protected from yellow, purple and blue virus attacks. If you’re already infected with one, wandering into PurifyingZone’s range will instantly heal you.
Gozu
- Legendary
- Fuse – FrostBolt + Purifying Zone
- Named after the movie of the same name, Gozu brainwashes nearby enemies and makes them start fighting other enemies. If you’re lucky you can set up a chain reaction where brainwashed enemies can then brainwash others.
CreepingVenom
- Common
- Fuse – Screamadelica + any Common Attack-type Bastard
- CreepingVenom will fire poison shots at any nearby enemies, doing initial damage and then continuous damage which chips away at their health for a while.
PulseMirror
- Common
- Fuse – N/A
- Part defensive and part offensive, PulseMirror creates a barrier around Romeo which protects him from attacks but also returns damage to the attacker.
Nosferatu
- Rare
- Fuse – ManaBloom + SuicideAttack
- Just like the vampire of the same name, Nosferatu specialises in absorbing blood from enemies in its range. What this means for Romeo is his Deadly Summer meter fills up a lot quicker.
StealJobs
- Rare
- Fuse – N/A
- If you fancy yourself as a sort of Bastard cultivation expert, StealJobs is the Bastard for you. It’ll steal a Bastard seed from an enemy in front of it, meaning you can quickly build a collection of seeds.
SweeperBeam
- Epic
- Fuse – FrostBolt + MultiLazer
- When SweeperBeam spawns, it creates a powerful laser beam that joins it to Romeo. By running around the stage you can move the beam around, harming any enemies it hits.
WeakenFlower
- Epic
- Fuse – PurifyingZone + DeadlyBowler
- Some enemies in the game have blue flower-like weak spots, but not all of them. WeakenFlower changes that by firing shots at enemies which turn into weak spots when they hit, allowing you to do extra damage to them.
Mictlantecuhtli
- Legendary
- Fuse – SweeperBeam + WeakenFlower
- Not only is it a great Scrabble word, Mictlantecuhtli will also create a wormhole under the feet of any nearby enemies and teleport them to Romeo, damaging them and knocking them down in the process.
Romeo is a Dead Man: Which Bastards are the best?
Obviously, because players have different playing styles, your favourite Bastards may be different from those of other players.
That said, there are some Bastards that will generally be a better choice than others, and the ones we’d recommend you focus on upgrading through Fusion.
Here’s a list of my personal favourite Bastards – harvest a bunch of the same species and fuse them to get a really powerful one, and combat should be easier.
SentryCannon
Although it’s one of the more common Bastards in the game, SentryCannon is also the most straightforward source of damaging enemies. Nothing it does is particularly flashy, but fuse your way up to a powerful one and it’s a useful way of chipping away at enemies.
ManaBloom + Graha Malla
Graha Malla is extremely powerful, but it takes a long time to charge up its attack. Use ManaBloom to distract enemies and focus their attention on it, then immediately summon Graha Malla to charge up its attack while they’re looking elsewhere.
Nosferatu
The ability to suck enemies’ blood and quickly charge up Romeo’s Deadly Summer meter is extremely useful in boss fights, especially later in the game where you can stock two or three Deadly Summers at a time.
GreenTornado
You’ll need to fuse it up to a more powerful one before it can really make an impact, but unleash GreenTornado when you’re surrounded by a large group of enemies and watch it drain their health like nobody’s business.